Broken LCD monitor. Doesn’t turn on, or maybe it doesn’t stay on once turned on, or perhaps it makes an annoying buzzing noise.
Sound familiar? One of my monitors recently broke and became like that, in fact it had all the symptoms above.
I thought I would have to waste a two-three hundred euros to get a new one, but turns out it might be possible to very easily (and cheaply!) repair it yourself.
Warning / Disclaimer
Depending on how your monitor is broken, this guide might not help you at all! Try this only if you’re feeling adventurous enough.
I’m not an electronics guy. The only thing I know about electronics is how to use a soldering iron. If you know more than I do about all this, please point out any glaring mistakes in the comments ;)
Do not do this on a monitor which is still covered by a warranty. It will most definitely void it.
Do not inhale the gas from soldering, there’s a fire-hazard, the iron is hot, blah blah blah. You have been warned.
What the problem is and how to fix it
The problem that’s causing your monitor to not function properly could be that the capacitors are on their way out. This is what a capacitor looks like.
The way to fix the problem is to take out all the broken capacitors and replace them with new ones of the same type. This means you’re going to have to open the monitor, inspect the circuit boards for broken capacitors (don’t worry, they are easy to spot), and replace them with new ones.
Luckily capacitors are usually very cheap, the ones I replaced cost 0.10 USD a piece.
If you have a local electronics shop, they can probably sell you the capacitors you need. The easiest way to do this would be to just take the broken ones off and bring them to the store. The employees should be able to figure out what kind of ones you need as replacements.
What you need for this
For this, you’ll at least need a soldering iron. If you don’t own one or can’t borrow one, you can probably buy one for less than 50 USD. Even a very basic one will do – there are models with temperature control and all sorts of stuff on the market, but the one I used was just “plug and play” type with no gimmicks and it worked just fine.
Depending on your case, you might also need solder. I didn’t need any though, as I was able to reuse the old one.
A screwdriver and maybe a small knife depending on your monitor.
Steps
As the first thing, I’d suggest you look for a service manual for your monitor on Google. These usually include a step by step guide on how to disassemble the monitor. For example, try “monitor_model service guide”
In my case, it had some weird clip thing for the back panel – no visible screws or anything – so having the manual was good because otherwise I might’ve broken the back panel more than I did ;)
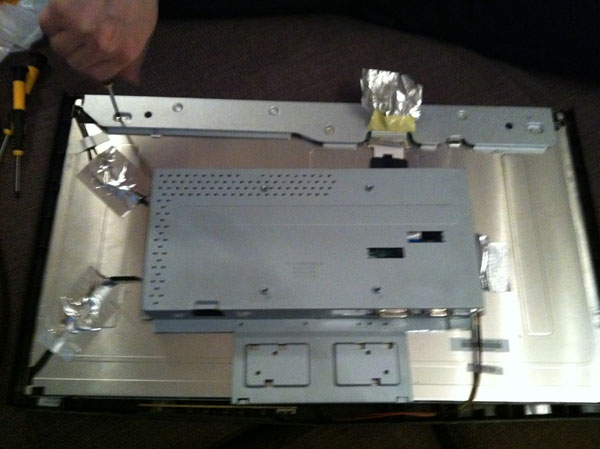
Once you remove the back panel, it’ll probably look something like this. Be careful with the little wires connecting the buttons and other stuff as they can be easy to accidentally yank out.
In my case, the circuitboards which had the capacitors were inside the metallic box in the center.

The boards should look familiar if you’ve ever assembled your own computer instead of buying one off the shelf.
Removing these two boards from the enclosure, it’s time to inspect for broken capacitors.

In the above photo I’ve marked one capacitor in red. Can you see how the top part is bulging out, like there was pressure inside it? That’s how you tell when a capacitor is broken. The other ones have flat tops, so they should be fine.
It’s easier to see when you actually have it in front of you (or have a better quality photo ;) ).
Before we remove the capacitor, it’s important to take note which way the gray strip on the side of it is pointing. Each capacitor has a positive lead and a negative lead, and the gray strip tells us which one is the positive. When replacing it, we must place the new one the same way as the old one was, so take note where the gray strip is.
Also, if you haven’t used a soldering iron before, or are not confident enough, it might be a good idea to perhaps look up a guide on Google before going any further.
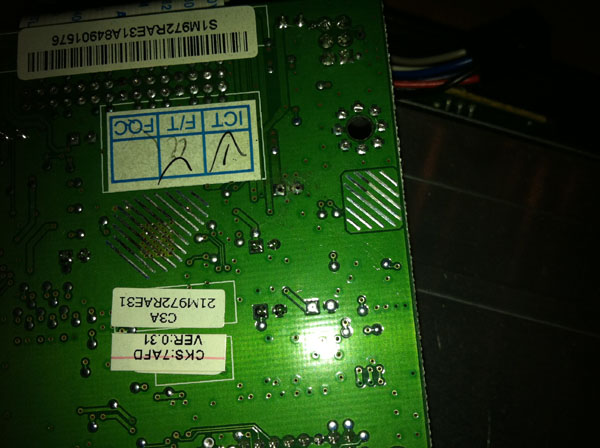
On the other side of the board, locate where the capacitor’s leads. Use the soldering iron to melt the solder. When it’s liquid enough, yank the capacitor out.
The numbers on the side of the capacitor tell you the type. These are used to determine suitable replacements.
Now, put the capacitor (or capacitors, if you had more than one broken one) into your pocket and go to the electronics store to get them replaced. I’ll wait.
Got new ones now?
Now it’s simply a matter of soldering the new ones in the place of the old ones.
Put the new capacitor where the old one was (be sure that the gray strip faces the same way) and use the soldering iron to melt the solder so the new one sticks in place. If it doesn’t work, you may need to apply some more solder to it.
After you’ve replaced all the damaged capacitors, put everything back together and hope for the best.
Done!
If you’re lucky, your monitor will now work again. Congratulate yourself for saving a couple hundred dollars (depending on model of your monitor)!